content row
The Applicant Tracking Module serves to:
-
Post positions
-
Accept applications
-
Facilitate the pre-employment process
-
Hire applicants into positions
Table of Contents
Please note: This user guide is current as of August 2020 and is subject to change. It will be updated as new PeopleAdmin modules are added and as changes are made to the system or processes.
Logging into the System

-
To log in to the PA7 Applicant Tracking Module for Non-Faculty & TES positions, navigate to the AU Access login page at https://auaccess.auburn.edu/ using your web browser.
-
All Auburn University employees have existing PeopleAdmin accounts, with few exceptions. There is no need to request a new account in most cases. Access to functions of the system are granted by division Human Resources Liaisons and Auburn University Human Resources.
-
If additional access to functions of the system is needed, the request should be made through the division Human Resources Liaison.
User Groups
User groups are determined by each division's Human Resources Liaison (HRL) and Auburn University Human Resources (AUHR). When accounts are requested, the requester may select the appropriate user group. The Employment Services team will review the user group requested to confirm the accuracy of the request.
Access to functions in the system is determined by the user group's scope:
-
Department scope - access to individual department(s)
-
Division scope - access to all departments in a division
-
Organization scope - access to all divisions and departments
-
Individual scope - individual access or notification determined by "tagging" user on a form
User Groups and their scope:
-
Equal Opportunity Compliance - Organization scope
-
Compensation - Organization scope
-
Employment - Organization scope
-
Executive Director of Compensation - Organization scope
-
HRL - Division scope
-
HRL-TES - Division scope
-
Initiator - Department scope
-
OIP - Organization scope
-
OIT - Individual scope
-
Research Security - Organization scope
-
Supervisor (receives notification email only) - Individual scope
-
Temporary Employment Services (TES) - Organization scope
Welcome Page

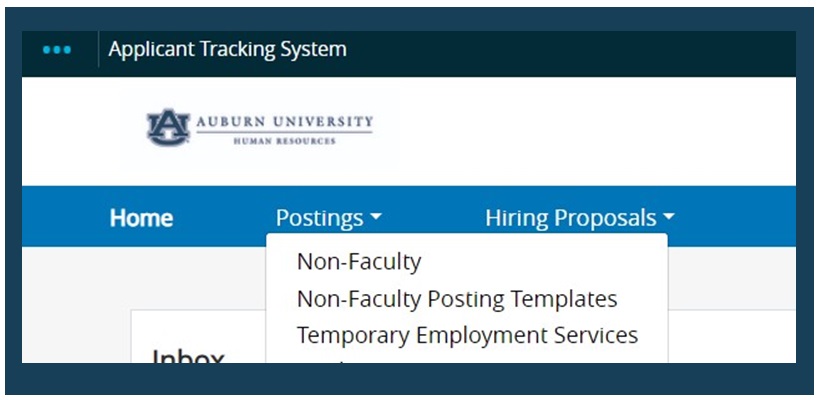
After logging in, users will be directed to the Welcome Page. Depending on the type of access, users may see different versions of the Welcome Page. To access the Applicant Tracking System module, follow these steps:
-
Select the three blue dots in the top left corner.
-
Select "Applicant Tracking System".
-
Inbox: Pending postings and hiring proposals for review
-
Watchlist: Postings and hiring proposals reviewed by users can be added to the user's watchlist.
-
Shortcuts: Shortcuts to custom searches for postings and hiring proposals can be created.
Creating a Non-Faculty Posting
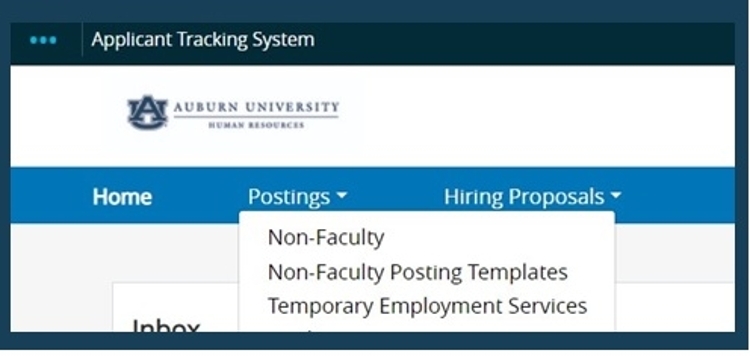
content row
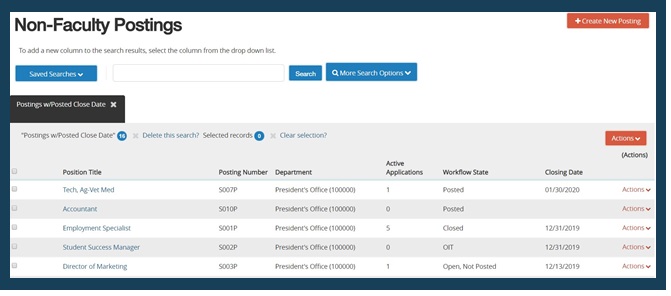
 2. Select Create New Posting. There are a few options for creating postings:
-
Create from Position Type: This option will provide a completely blank form to create a posting. This is not recommended.
-
Create from Posting: This option will allow users to duplicate an existing posting.
-
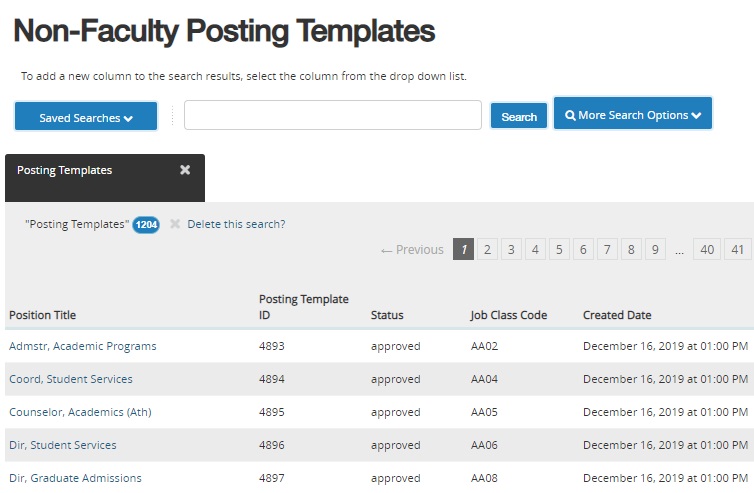
Create from Posting Template (Recommended): This will allow users to select the position by job code and will populate most position information.
content row
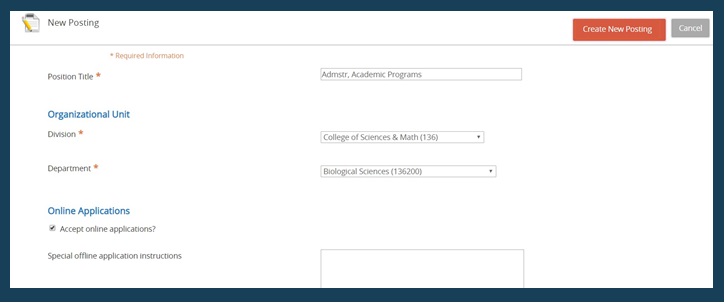 5. Select the appropriate Division and Department and select Create New Posting.
There will be a number of required fields to complete. These fields will be notated by an asterisk and red outline. The form may not be submitted until these fields are completed.
content row
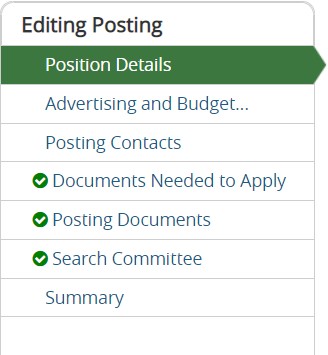 6. You can navigate through the pages of the posting form using the sidebar menu or the Next button. You can save your changes by selecting the Save or the Next button on each page of the form.
-
The Job Summary, Essential Functions and Minimum Education/Experience will populate from the posting template. Users may customize Job Summary and Essential Functions in order to fully describe the specific role. For Job Family postings, please enter the Minimum Education/Experience for the lowest level to be posted.
-
Complete all required fields on the Posting Details, Advertising & Budget Details and Posting Contacts pages. To progress to each page, use the Next button, or navigate using the sidebar menu.
-
On the page labeled Documents Needed to Apply, users will identify the documents they will require applicants to attach to their applications.
-
On the page labeled Posting Documents, users may add any documents related to the posting or position (this is not required).
content row
content row
content row
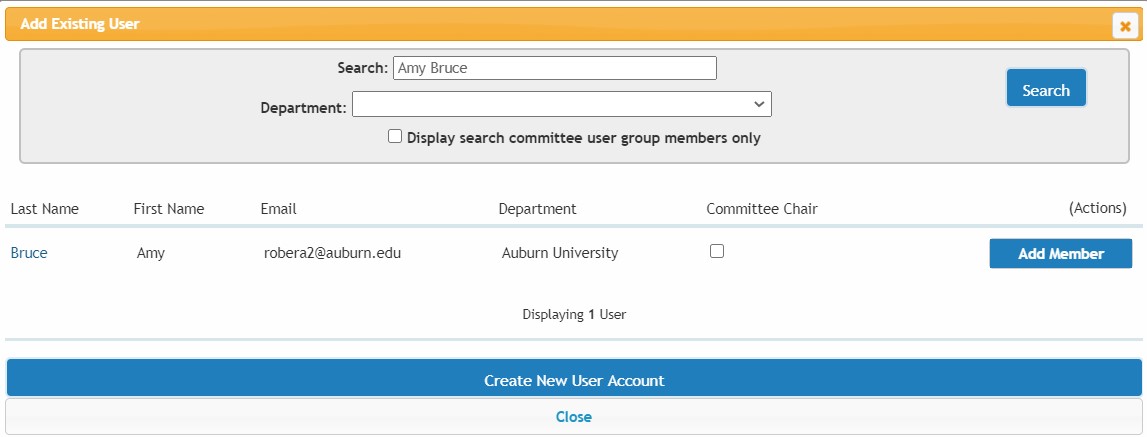
3. Search for the employee by name. Select Add Member to add them to the search committee. Check the box for Committee Chair if appropriate.
content row
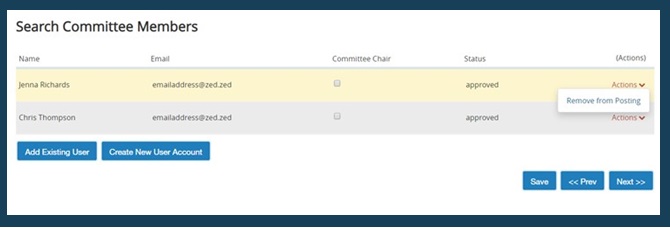 4. Search committee members will receive email notifications if they are added prior to the position being posted. If search committee members are added after the position is posted, they will not receive email notifications. The search chair should provide these members with the link to login and review applications, as well as the links to search committee training and the confidentiality agreement.
To remove committee members, hover over the Actions link and select Remove from posting.
content row
Summary Page and Submitting Posting for Review
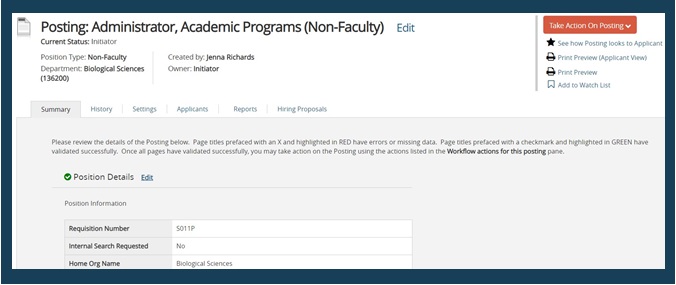 1. The last page of the posting form is the Summary page. This will provide users with a one page view of all pages of the posting form. Ensure each section has a green check mark; this means the section is complete. An orange check marks indicate that the page has required fields that must be completed.
content row
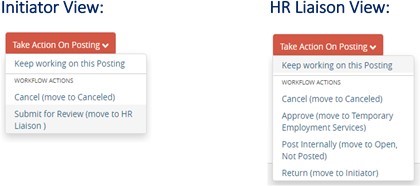
2. When users are ready to submit the posting for review, hover over the orange button that says Take Action on Posting.
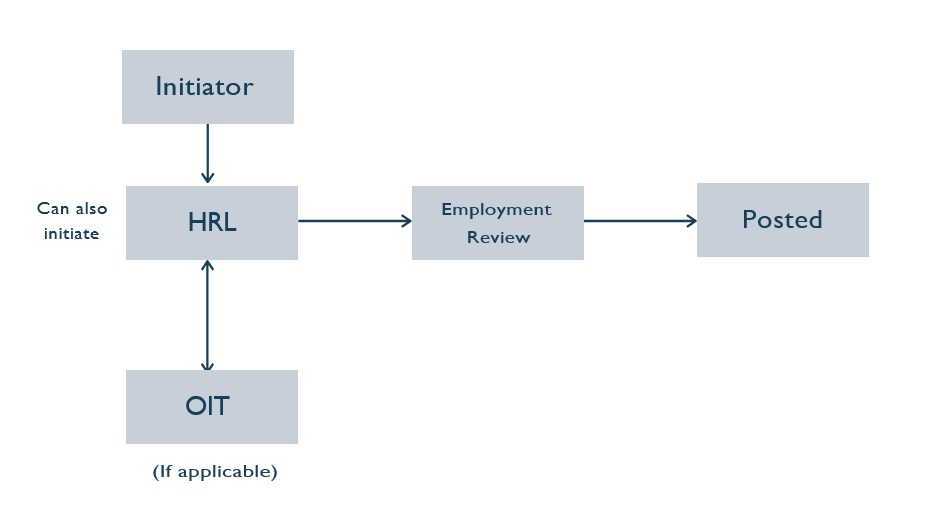
Users who have created postings as an Initiator must send the posting to an HRL user role in order to send the posting to other user roles for review.
HRL user roles have the ability to send the posting to the Employment team for review and posting. If the posting is for an IT position, the HRL should send the posting to OIT for review. OIT will return the posting to the HRL to send to the Employment team for review and posting.
content row
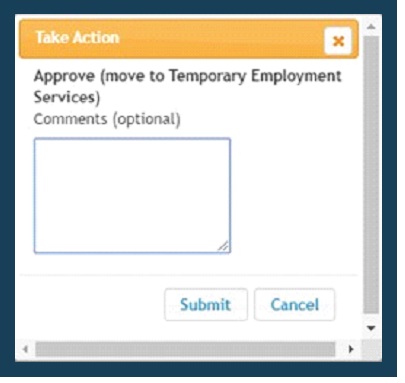
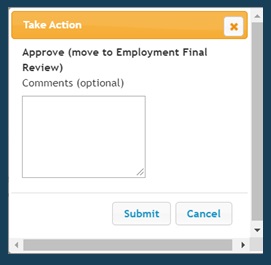 3. To transition the posting form to the next reviewer, the HRL will select the appropriate user role from the dropdown list. When the confirmation box appears, select Submit.
content row
 4. If the posting was successfully transitioned, a banner will appear at the top of the screen.
content row
Reviewing Applications
content row
content row
Changing Applicant Status
 1. It is important to know that the system is only able to give one user group the ability to change application statuses. This user group is Initiator. If an HRL user needs to change application statuses, they must change their user group to Initiator.
To change user roles, navigate the the top of the screen and use the dropdown menu to change the user group to Initiator.
Users whose primary user group is Initiator will not need to take any action in order to have the ability to change application statuses.
content row
Changing Faculty, TES and Student Applications
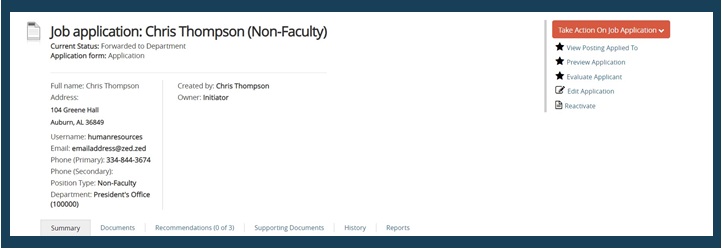
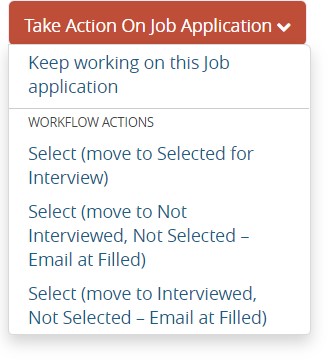 2. On the selected application, hover over the Take Action On Job Application button and choose the appropriate application status.
Some applicant statuses will require you to select a reason. Use the dropdown box to select the most appropriate reason that supports the status you selected.
For Non-Faculty positions: the application statuses "Interviewed/Not Selected" and "Not Interviewed/Not Selected", you will need to provide specific rationale in the Explanation field.
content row
content row
content row
Non-Faculty Application Workflow
Submitting Candidates for Review:
The status of applicants selected for interview should be changed to "Selected For Interview" in PeopleAdmin prior to scheduling an interview.
The Employment Services team will then review the applicant’s qualifications and will update the status to "Approved to Interview." This transition will trigger an email to the Initiator and HRL. At this point, the candidate may be contacted for an interview.
If Employment Services determines that a candidate does not meet the minimum qualifications, they will reach out to the HRL.
Submitting Candidate Selection/Non-Selection Reasons:
The Employment Services team is responsible for updating all application statuses with reasons for selection or non-selection once an employment search has taken place.
The HRL should provide these reasons using a form called the Applicant Evaluator. These should be submitted to the assigned Employment Specialist.
Once the Employment Services team has updated PeopleAdmin with these reasons, the Initiator and HRL will receive an email instructing them to create the hiring proposal form for the selected finalist.
Creating a Non-Faculty Hiring Proposal
 A hiring proposal form will serve as the mechanism that hires an candidate into a position. It is a form that will be updated as pre-employment steps are completed. A hiring proposal may be created by an Initiator or HRL and will follow a pre-determined workflow.
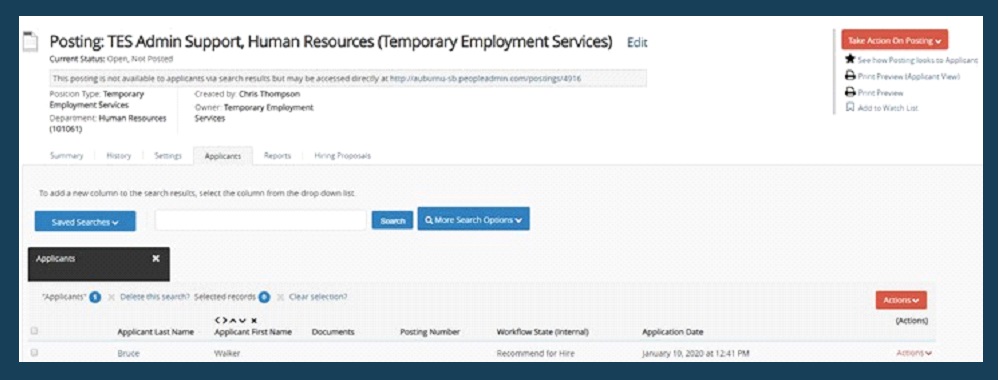
To create a hiring proposal, the applicant status must be changed to Recommend for Hire from the posting.
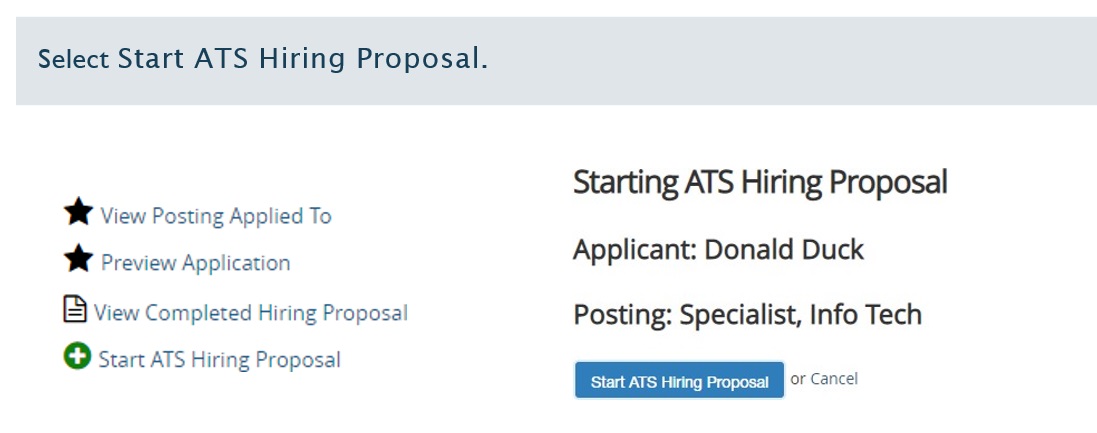
1. Select Start ATS Hiring Proposal.
content row
content row
content row
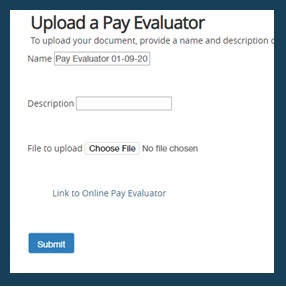 4. Select Choose File to locate the file on your computer. Select Submit to attach the file.
content row
 5. A message at the top of the screen will confirm that the file was attached.
-
You will notice locations for the new hire documents to be submitted on the Hiring Proposal Documents page. These will be utilized in the last step of the process, once the candidate has signed an offer letter. We will outline the workflow for hiring proposals further in this guide.
-
The next page, the Hiring Proposal Summary, will show you a snapshot of all the information on the form. If you see green checks beside each section, the form is ready to be submitted. If you see an orange exclamation mark, your attention is needed to required fields.
content row
 6. To submit the hiring proposal to the next user, you will use the Take Action on Hiring Proposal button.
Routing a Non-Faculty Hiring Proposal
1. If you are an Initiator, you will submit the hiring proposal to the HRL for review. There is also an option to Cancel.
If you are an HRL, you will have the option to send the hiring proposal to a number of user groups:
-
OIT: For technical positions
-
OIP: If the candidate is a foreign national
-
Research Security: If the candidate needs a foreign background check
-
Compensation: If the hiring proposal is ready for the Compensation team's review
-
Initiator: If the hiring proposal needs to be edited or held by the Initiator
content row
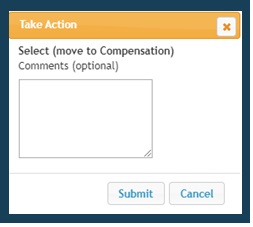 2. Select Submit
content row
Routing a Non-Faculty Hiring Proposal for Review
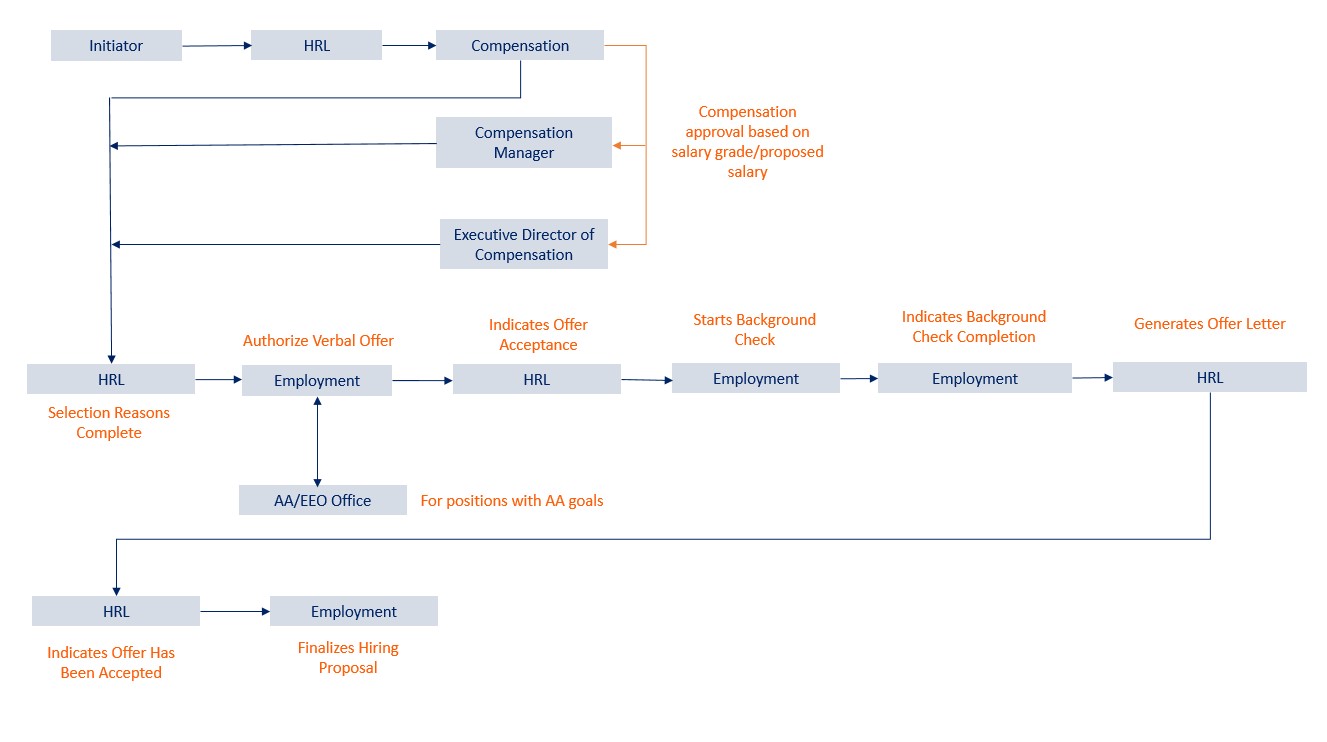 In order to complete the hiring proposal process, the hiring proposal form must route through a number of user groups for review, approval, or to take some form of action. When a hiring proposal is submitted to another user group, we call this a workflow.
Once a hiring proposal is pending review from a user group, we call this a workflow state. Think of it as the status of the hiring proposal. Every workflow state has an owner. The owner is responsible for changing the workflow state of a hiring proposal once they have reviewed it or take a necessary action outside of the system (i.e. obtaining verbal offer acceptance)
-
When users are the owner of a hiring proposal, the workflow state will indicate what action is needed from the user.
-
When you are ready to send the hiring proposal to the next user, you will only have the option to send it to the correct user group or back to the previous user. This should remove the guess work in determining who should review the hiring proposal next.
content row
Routing Process for Non-Faculty Hiring Proposals
-
The Initiator or HRL creates a hiring proposal.
-
If created by an Initiator, the Initiator will send to the HRL for approval.
-
The HRL will route to Compensation with the pay evaluator attached.
-
For IT positions, HRL will route to OIT.
-
For all other positions, Compensation reviews the pay evaluator, attaches a signed copy of the pay evaluator, and routes the hiring proposal to the HRL.
-
The HRL attaches pay evaluator with all signatures to the hiring proposal and routes to Employment once all applicant selection reasons have been completed.
-
For positions with Affirmative Action goals – Employment routes to AA/EEO.
-
AA/EEO route returns hiring proposal to Employment.
-
Employment authorizes verbal offer by sending the hiring proposal to the HRL.
-
For positions without Affirmative Action goals – Employment authorizes verbal offer by sending the hiring proposal to the HRL.
-
The HRL returns the hiring proposal, indicating verbal offer acceptance. Employment orders the background check.
-
Employment changes workflow state to indicate the background check is processing.
-
Employment returns the hiring proposal to the HRL indicating background check clearance.
-
The HRL generates the offer letter (function is within the hiring proposal form) and submits to the Finalist. The Finalist will digitally sign and return the offer letter.
-
Once the Finalist signs the offer letter, the HRL routes the hiring proposal to Employment, where it is finalized.
content row
![]() 2. Once the offer letter has been signed, the digital signature will appear below the offer letter. Once signed, the HRL will route the hiring proposal to Employment or TES, indicating that the offer letter has been signed. The workflow state will be Offer Letter Signed/Offer Accepted. The hiring proposal will then route from Employment to the HRL so that the new hire documents may be attached.
2. Once the offer letter has been signed, the digital signature will appear below the offer letter. Once signed, the HRL will route the hiring proposal to Employment or TES, indicating that the offer letter has been signed. The workflow state will be Offer Letter Signed/Offer Accepted. The hiring proposal will then route from Employment to the HRL so that the new hire documents may be attached.
Creating a TES Posting
content row
There are a few options for creating postings.
-
Create from Position Type: This option will provide a completely blank form to create a posting.
-
Create from Posting: This option will allow users to duplicate an existing posting. Keep in mind there will be no existing entries if the position has not been in the system previously.
content row
content row
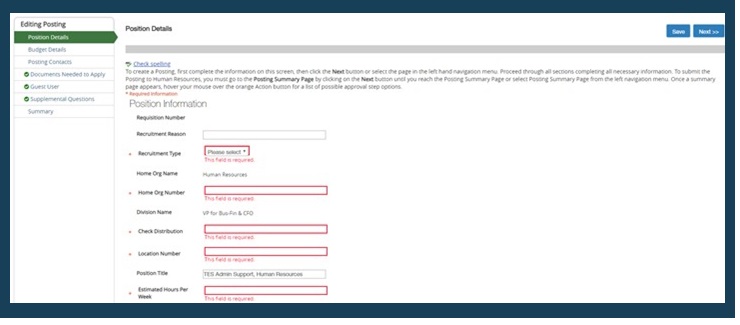 5. Complete all required fields on the Posting Details, Advertising & Budget Details and Posting Contacts pages. To progress to each page, use the Next button, or navigate using the sidebar menu.
There will be a number of required fields to complete. These fields will be notated by an asterisk and red outline. The form may not be submitted until these fields are completed.
IMPORTANT: Recruitment Type determines the path of your workflow.
-
Direct Hire – This process is used when a department has already identified the candidate they are wanting to hire. Direct Hire postings will be privately posted so only the selected candidate can apply.
-
Recruitment – Used when a department needs applications to review. Recruitment postings will either be advertised on the website for applicants to apply or HR will add applications from a pooled posting.
You can navigate through the pages of the posting form using the sidebar menu or the Next button. You can save your changes by selecting the Save or the Next button on each page of the form
content row
 On the page labeled Documents Needed to Apply, users will identify the documents they will require applicants to attach to their applications.
-
Not Used – No document will be able to be uploaded.
-
Optional – The document type is optional but not required to submit the application.
-
Required – The document type to submit the application.
content row
 Guest Users are only for non-users whom will need to be able to review applications (i.e. Supervisors who are not an initiator or HRL). To create a Guest User, simply click on Create Guest User Account. A username and password will be automatically generated for you. Add email address(es) of recipients needing to review applications to posting.
Supplemental questions should be used to initially screen applications. You may set these up or HR can set them up based on what is provided in the posting.
content row
Summary Page and Submitting Posting for Review
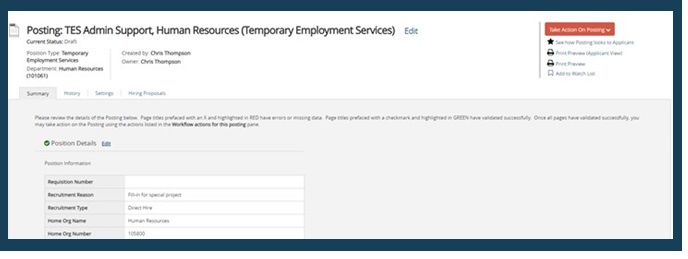 The last page of the posting form is the Summary page. This will provide users with a one page view of all pages of the posting form.
Ensure each section has a green check mark; this means the section is complete. An orange check marks signifies that the page has required fields that must be completed.
content row
content row
content row
Creating a TES Hiring Proposal
content row
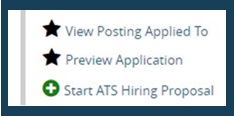 5. Click on Start ATS Hiring Proposal, located on the right hand of the screen.
content row
 6. The next screen will verify what candidate and position you are starting a hiring proposal on. Click the Start ATS Hiring Proposal button to proceed or Cancel to go back to the previous slide.
content row
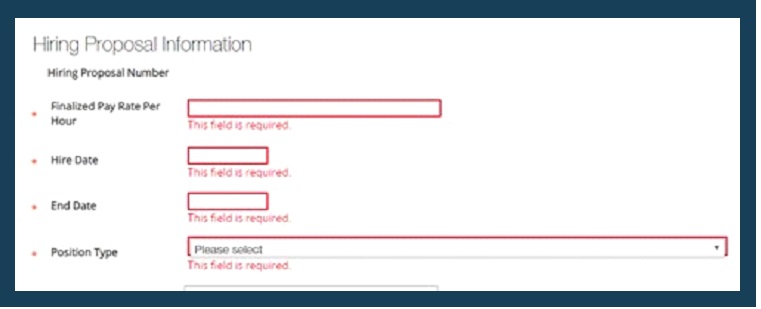 7. Most information will copy over from the posting, scroll to the bottom to view and complete Hiring Proposal information. To progress to each page, use the Next button, or navigate using the sidebar menu.
There will be a few required fields to complete (Finalized Pay Rate Per Hour, Hire Date, End Date, Position Type and Will this position be responsible for driving a University vehicle?). These fields will be notated by an asterisk and red outline. The form may not be submitted until these fields are completed.
content row
Summary Page and Submitting TES Hiring Proposal for Review
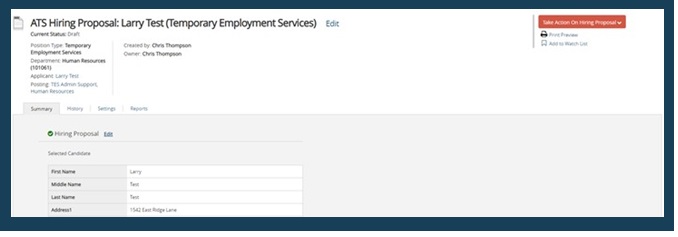 1. The last page of the hiring proposal is the Summary page. This will provide users with a one page view of all pages of the hiring proposal form. Ensure each section has a green check mark; this means the section is complete. An orange check marks signifies that the page has required fields that must be completed.
content row
2. When users are ready to submit the hiring proposal for review, hover over the orange button that says Take Action on Hiring Proposal.
content row
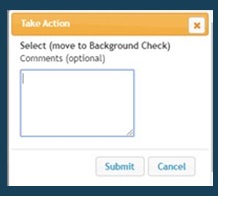 3. To transition the posting form to the next reviewer, the Human Resources Liaison will select the appropriate user role from the dropdown list. When the confirmation box appears, select Submit. This step will initiate TES to run a background check and an email with instructions will be generated to the applicant.
After the background check is complete, TES will send the hiring proposal back to the HRL to initiate an offer letter; the current status will appear as Background Check Complete/Request for Offer Letter. See Offer Letter section for further instruction.
Email Notifications
A number of email notifications are automated by the applicant tracking system. If a posting or hiring proposal is pending review from your user group, you will receive an email notification. Initiators and Human Resources Liaisons will receive email notifications anytime a posting or hiring proposal is submitted to a new user group.
Additionally, the system will send the following:
-
An email to the applicant when the application is disqualified for not meeting minimum qualifications
-
An email to applicants who were not selected for positions. This is triggered when the position is marked as Filled by Employment, once the hiring proposal is finalized.
-
An email to the finalist candidate with background check information once the verbal offer is accepted.
-
An email to the finalist candidate containing the offer letter, once the action is triggered by the Initiator or Human Resources Liaison.
Technical Assistance
For questions or help using the system, please contact the Employment Services team for Non-Faculty positions, and Temporary Employment Services for TES positions using the contact information below. Please visit our Project PeopleAdmin website for additional resources and to access the PeopleAdmin Helpdesk to report system issues to our team.
Employment Services
-
Jenna Richards, (334) 844-1613, jbr0040@auburn.edu
-
Chris Thompson, (334) 844-1614, cot0001@auburn.edu
Temporary Employment Services (TES)
-
Amy Bruce, (334) 844-1671, robera2@auburn.edu






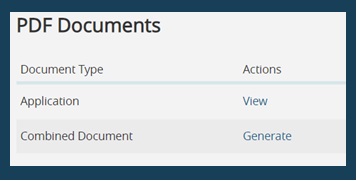


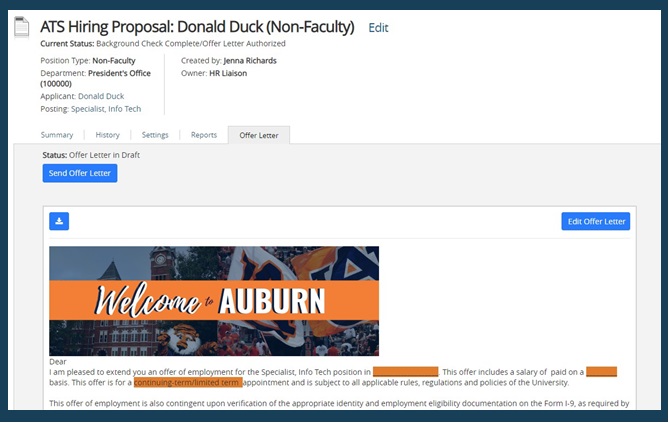 Offer letters are generated from the hiring proposal form. Once Employment or TES changes the workflow state to Background Check Complete/Request for Offer Letter, the Initiator and HRL user type will be able to create the offer letter from a template.


